
Weekly Edition · 12 October 2026
How to Convert a Shipping Container into a Tiny Home
A practical step-by-step guide to structural reinforcing, insulating, and finishing a durable DIY shipping container tiny home.
This Week
Container homes: converting shipping containers to tiny homes
A practical step-by-step guide to structural reinforcing, insulating, and finishing a durable DIY shipping container tiny home.
Structural Integrity: Cutting and Framing
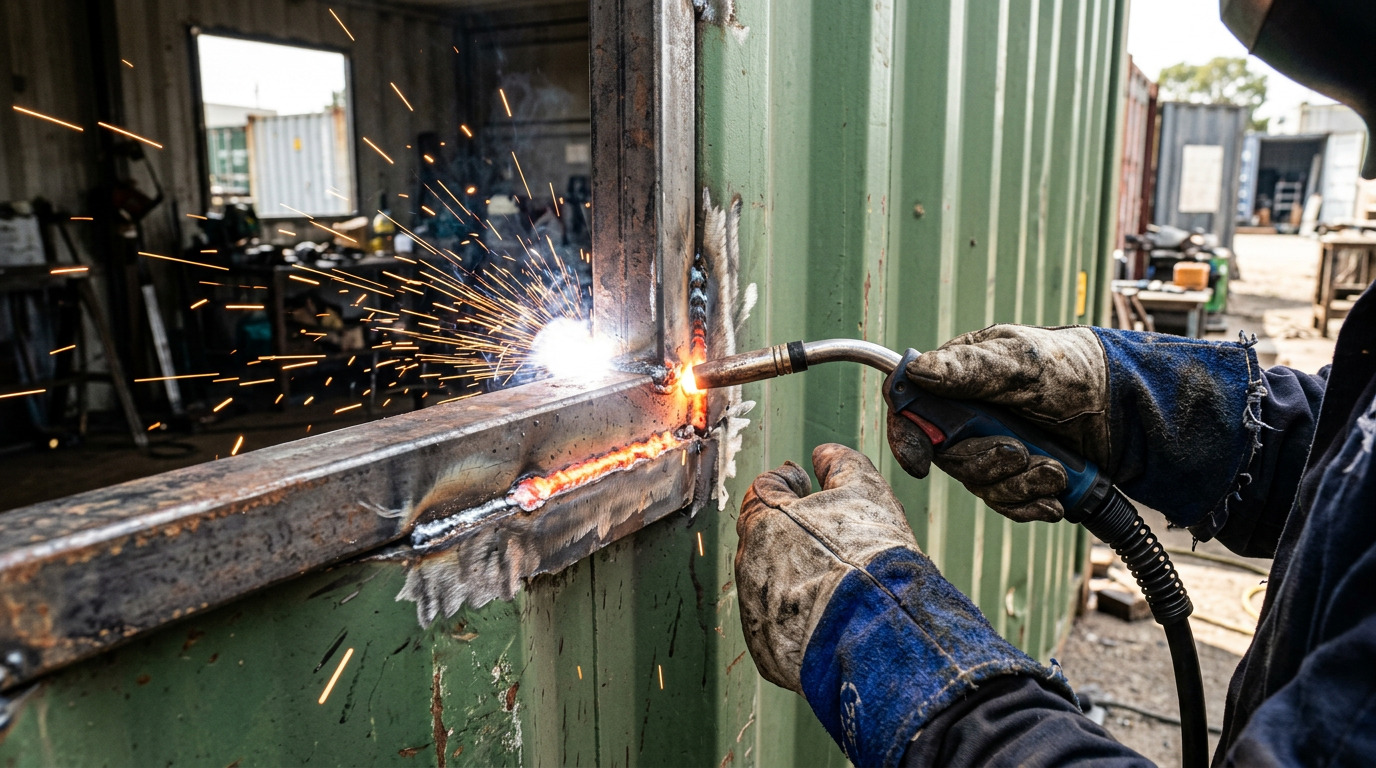
Shipping containers are incredibly strong, but only when their corrugated steel walls remain intact. The moment you cut openings for windows or doors, you compromise the structural integrity of the box. To prevent the roof from sagging, you must weld steel hollow structural sections (HSS) or C-channel frames around every single cutout. For a standard 2.4 m [8 ft] wide container, framing the openings with 50 mm by 50 mm [2 in by 2 in] steel tubing ensures the structure remains rigid. Always complete your steel welding and grinding before installing any interior timber framing.
Once the structural steel reinforcements are welded in place, you can begin the interior framing. Most builders use 50 mm by 75 mm [2 in by 3 in] or standard 50 mm by 100 mm [2 in by 4 in] timber studs to construct the internal walls. To maximize every millimeter of the narrow interior, you can mount the studs flat against the steel ribs or float the framing slightly off the walls to create a thermal break. Secure the timber bottom plates directly to the original marine-grade plywood subfloor using heavy-duty self-tapping screws.
Thermal Performance and Condensation Control
Steel is an excellent conductor of heat, which makes insulation the most critical phase of any container build. Without proper insulation, your tiny home will become an oven in the summer and a freezing, condensation-soaked box in the winter. Closed-cell spray foam is the gold standard for container conversions. Applying a minimum of 50 mm [2 in] of spray foam directly to the steel walls yields an R-value of around R-14 while creating a seamless, airtight vapor barrier that prevents moisture from condensing against the cold metal.
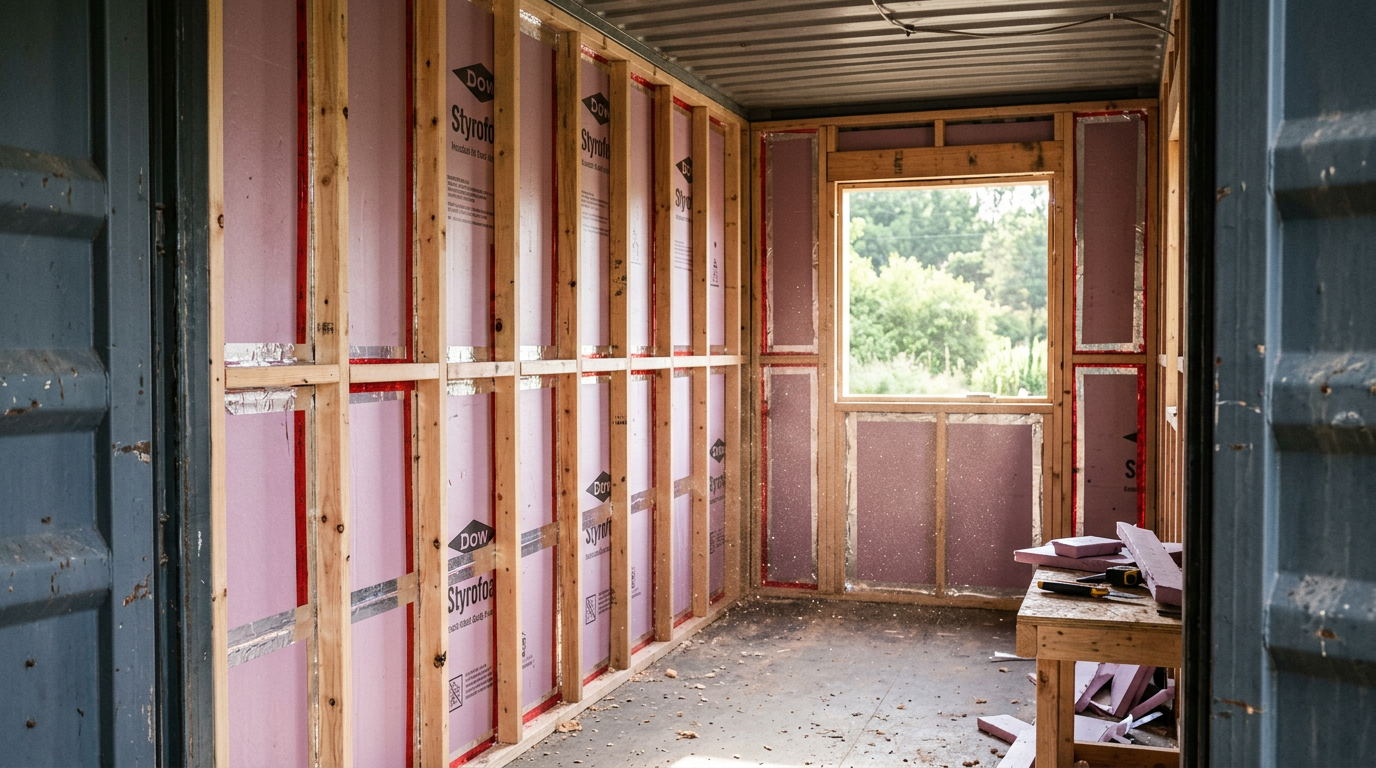
If spray foam is out of your budget, rigid foam boards like extruded polystyrene (XPS) are a viable DIY alternative. You must cut the boards to fit tightly between your timber studs and seal every single seam with high-quality vapor barrier tape. Any gaps left unfilled will allow warm, humid indoor air to reach the cold steel shell, leading to hidden mold growth and rust behind your drywall. Ensure you leave a small air gap or use a breathable house wrap on the interior side before hanging your tongue-and-groove cladding.

Designing for Narrow Spaces
A standard shipping container has an interior width of just 2.35 m [7 ft 8 in] before you add insulation and framing. Once finished, you are left with a living space roughly 2.2 m [7 ft 2 in] wide. To prevent this narrow corridor from feeling claustrophobic, focus on a linear layout with clear sightlines from one end to the other. Place your high-traffic zones, like the kitchen and living room, near large glass sliding doors to draw the eye outward. Utilizing light paint colors and natural timber finishes will also help reflect daylight and open up the volume.
Built-in, multi-functional furniture is essential in a container layout. Consider building a custom platform bed at one end of the container with deep storage drawers underneath, or design a fold-down dining table that doubles as a workspace. Aligning all plumbing and heavy appliances along a single utility wall simplifies your pipe runs and keeps the opposite wall free for circulation. Every centimeter counts, so opt for pocket doors instead of traditional swinging doors, which can consume precious floor space.
Foundations and Weatherproofing the Exterior
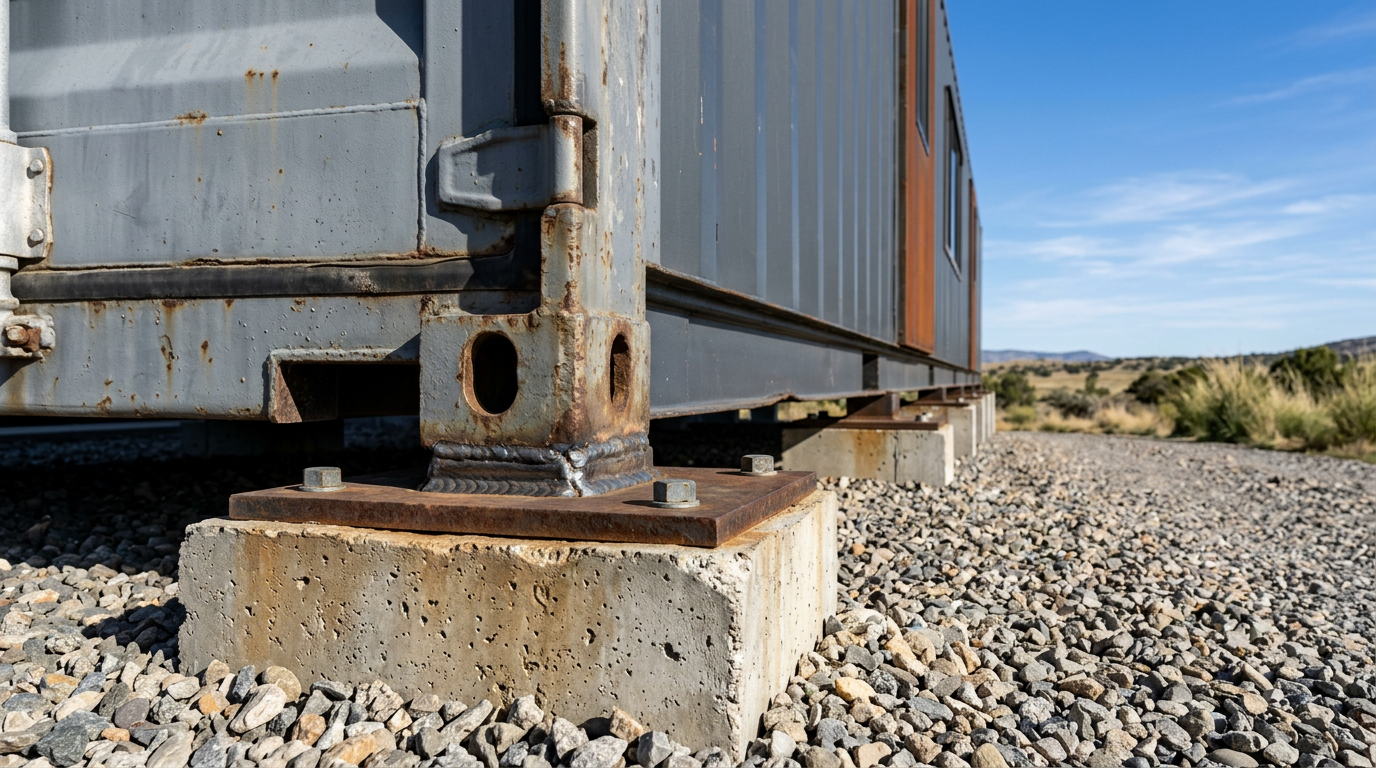
Shipping containers are designed to carry immense loads at their four corner castings, not along their side walls. Therefore, your foundation must support these specific corner points. Concrete pier foundations are the most cost-effective and structurally sound choice for DIYers. Pouring four to six concrete piers with embedded steel plates allows you to weld the container directly to the foundation, securing it against high winds and seismic activity. Elevating the container at least 300 mm [12 in] off the ground also prevents moisture from pooling underneath.
Before you call your build complete, you must address the exterior steel. Shipping containers endure harsh ocean environments, but they are still prone to rust if the protective paint is chipped. Wire-brush any existing rust patches down to bare metal, apply a zinc-rich rust-inhibiting primer, and finish with two coats of high-quality marine-grade acrylic paint. If you prefer a more natural aesthetic that blends into the landscape, you can install vertical timber furring strips directly to the steel ribs and clad the exterior in cedar or corrugated metal siding.