Weekly Edition · 28 September 2026
Kit vs. Scratch: Which Tiny Home Path is Yours?
Deciding between a prefab tiny home kit and building from scratch? We compare cost, time, and construction reality to help you choose.
This Week
Prefab tiny home kits versus building from scratch
Deciding between a prefab tiny home kit and building from scratch? We compare cost, time, and construction reality to help you choose.
The Kit Route: Speed and Structural Precision
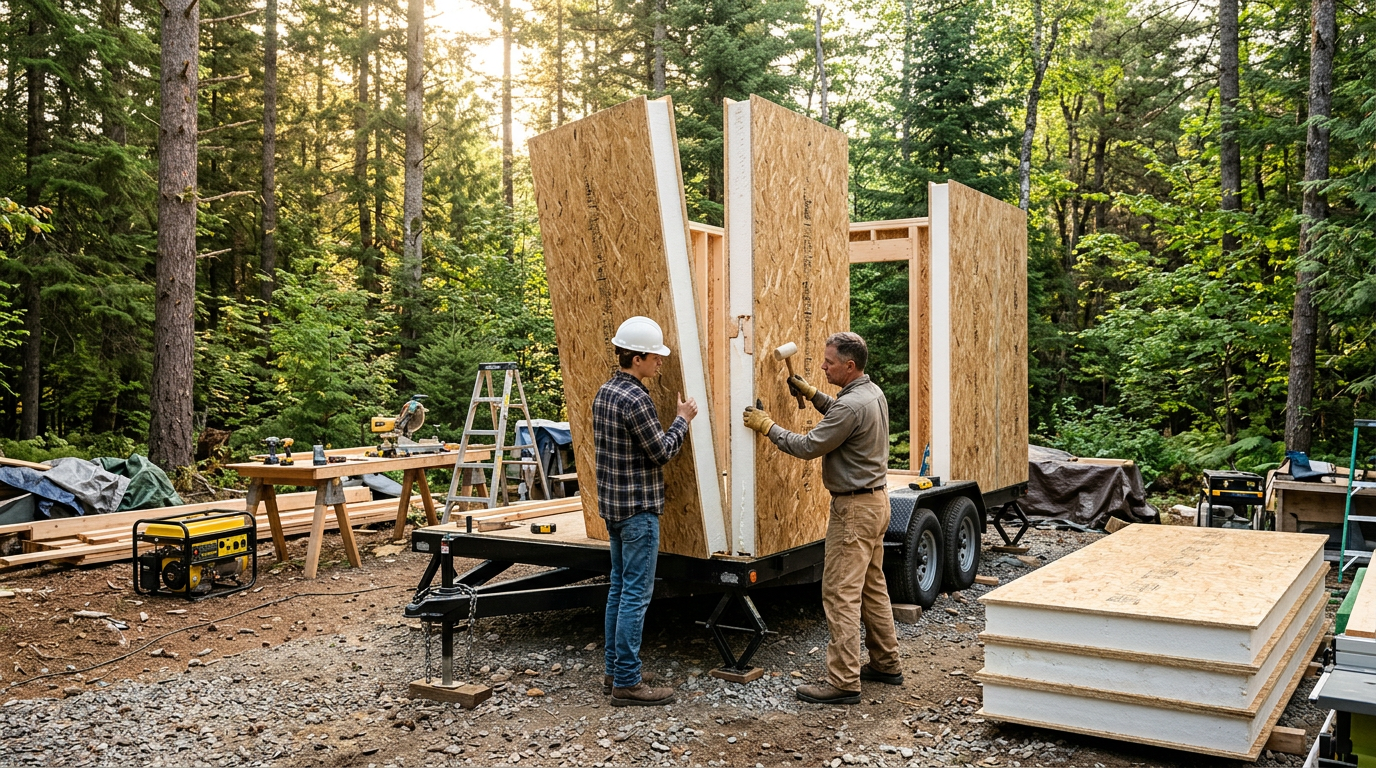
Prefabricated tiny home kits offer a compelling shortcut for builders who want to skip the high-stakes phase of structural engineering and framing. When you purchase a kit, you typically receive a pre-cut timber frame or a set of numbered structural insulated panels (SIPs) that fit together like a puzzle. For a builder working on weekends, this can compress the framing and dry-in phase from several months down to a single week. Instead of measuring, cutting, and re-measuring individual studs, you follow a pre-approved assembly manual, significantly reducing the risk of structural mistakes that could compromise your home's integrity on the road.
However, this speed comes with a financial premium and design constraints. Kit packages can cost anywhere from 30 to 50 percent more than raw lumber, and you are bound to the manufacturer's footprint, wall heights, and window openings. Standard kits often assume a standard trailer size, such as 7.3 meters [24 feet] by 2.4 meters [8 feet]. If you decide mid-build that you want an extra window to capture a mountain view, or if you need to shift a partition wall to accommodate a larger composting toilet, modifying a prefabricated panel system can be incredibly difficult and may void your structural warranty.
Scratch Building: Customization and Raw Savings
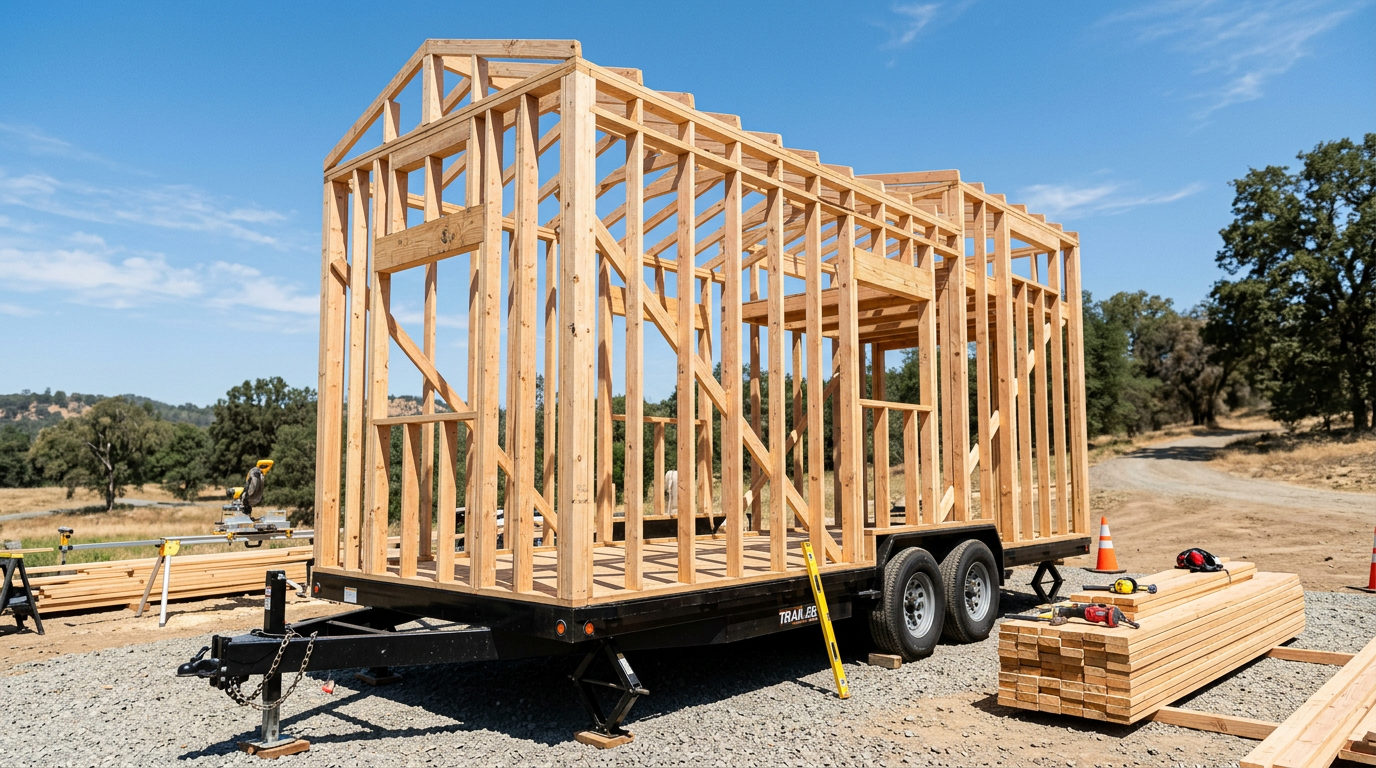
Building from scratch is the ultimate expression of creative freedom and cost efficiency, though it demands a massive investment of time and mental energy. By sourcing your own materials, you can hunt for reclaimed timber, buy local native cedar, and adapt your design on the fly. If you want to increase your ceiling height to 3.2 meters [10.5 feet] to fit a deep loft mattress, or widen your kitchen counter by 10 centimeters [4 inches], you simply adjust your cut list. For those with more time than money, scratch building allows you to pay as you go, buying materials in phases rather than facing a large upfront payment for a kit.
The challenge of the scratch build lies in the sheer volume of decisions and physical labor. You are your own structural engineer, architect, and supply chain manager. Every header over a window, every wheel-well flashing detail, and every rafters-to-wall-plate connection must be researched and executed correctly. This path requires a solid foundation in basic carpentry, a reliable set of tools—including a compound miter saw, table saw, and pneumatic nailer—and the patience to correct your own inevitable mistakes. It is common for a first-time scratch build to take 500 to 1,000 hours of active labor to complete.
Engineering for the Road
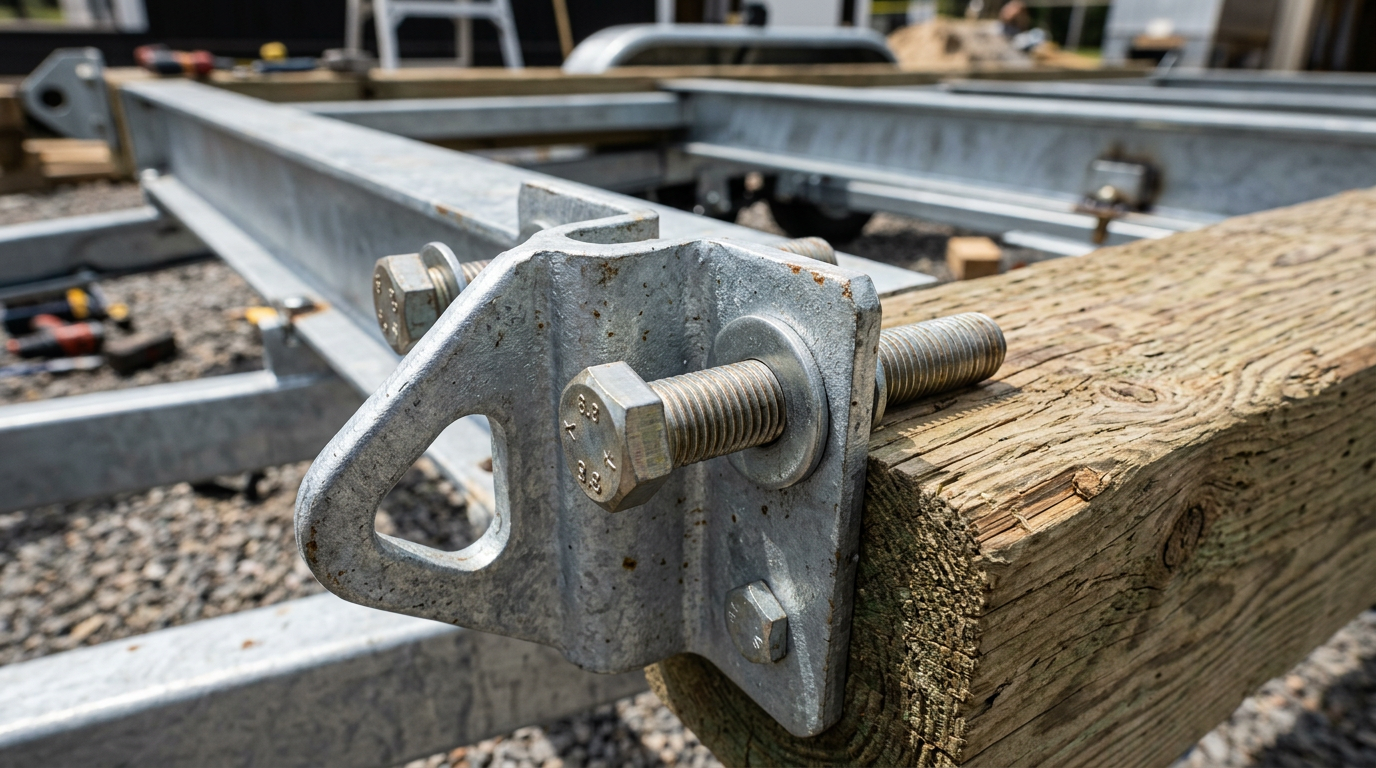
Whether you build from a kit or from scratch, the interface between your tiny house structure and its trailer is the most critical joint in the entire build. Mobile tiny homes experience hurricane-force winds and seismic-level vibrations every time they travel down the highway. A high-quality kit will often include engineered brackets, tension ties, and pre-drilled holes designed to align perfectly with a specific trailer model. These components ensure that the timber framing is mechanically anchored directly to the steel chassis, preventing the house from shifting or lifting during transit.
When building from scratch, you must engineer this connection yourself using heavy-duty tension ties, such as hold-downs, and grade-8 galvanized bolts. You will need to drill through your pressure-treated bottom plates and the steel flange of the trailer frame every 1.2 meters [4 feet], securing them with nylon-locking nuts to resist vibration. Additionally, you must account for thermal bridging; placing a thermal break, such as closed-cell sill gasketing, between the metal trailer and your wooden subfloor is vital to prevent condensation from rotting your framing from the bottom up.
The Common Ground: Utility Integration
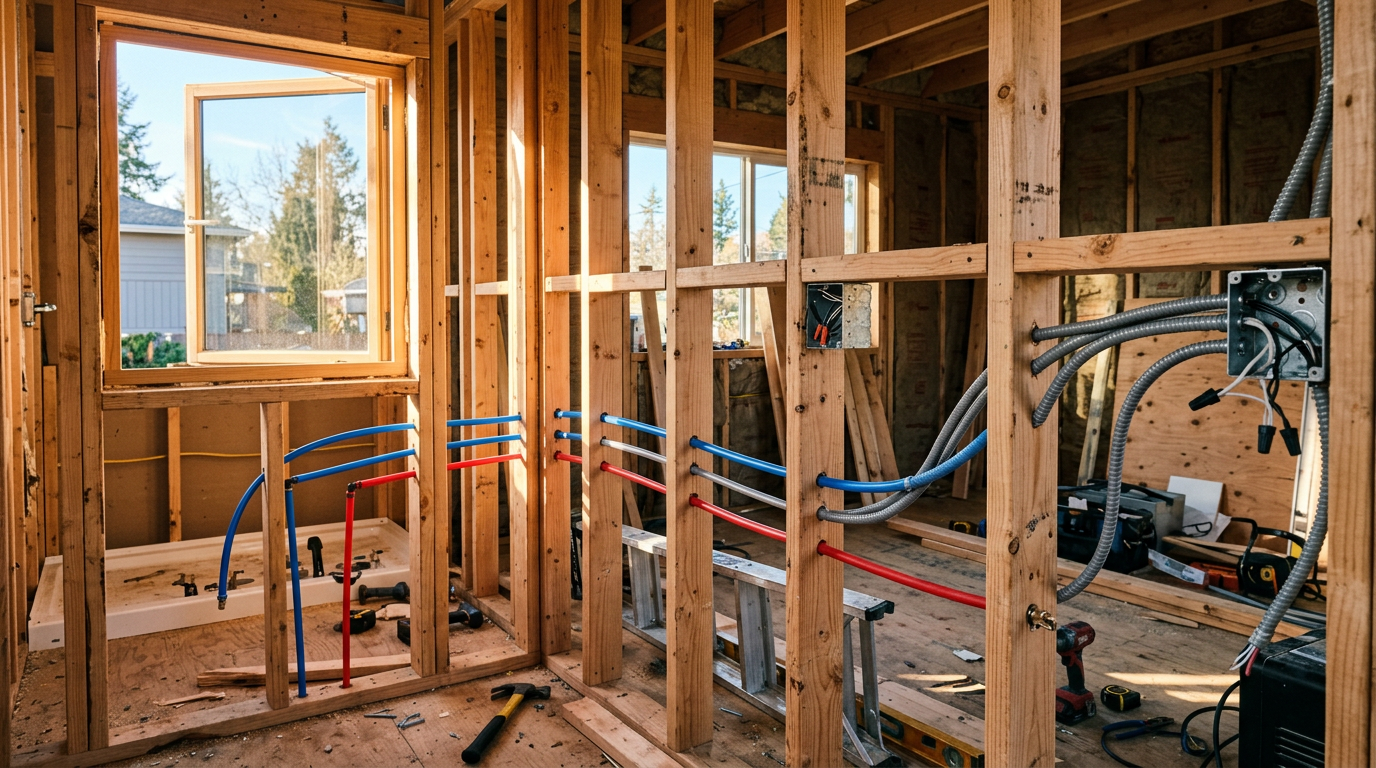
A common misconception is that buying a kit solves all the complexities of building a tiny house. In reality, a kit typically only solves the shell. Once the walls are up and the roof is on, both the kit builder and the scratch builder stand in the exact same spot: facing bare stud bays that need plumbing, electrical wiring, gas lines, and insulation. You must still navigate how to run 12-millimeter [0.5-inch] PEX water lines through your framing without weakening your studs, and how to route your electrical cables to meet local building codes.
This is where pre-planning pays off, regardless of your chosen path. Before driving a single nail or ordering a panel, you need a detailed floor plan showing the exact location of every outlet, switch, drain pipe, and appliance. For instance, knowing where your shower drain will exit the floor prevents you from accidentally placing a major floor joist directly under the drain pan. Take your time during this rough-in phase; once the walls are closed with drywall or tongue-and-groove cedar cladding, fixing a plumbing leak or a forgotten wire becomes a costly and frustrating demolition project.